Related Articles
Wire wrapping is a form of jewelry making that involves the manipulation and shaping of wire to create intricate designs. This technique dates back centuries and has been used by artisans around the world to craft unique and beautiful pieces. For example, imagine a delicate pendant adorned with gemstones, meticulously wrapped in silver wire, creating an exquisite work of art. In this article, we will explore the art of wire wrapping in detail, discussing its history, tools required, techniques employed, and tips for beginners.
The practice of wire wrapping can be traced back to ancient civilizations such as Egypt and Mesopotamia, where it was used to create ornate adornments for both men and women. Over time, this technique evolved and found popularity among contemporary jewelers who sought to incorporate elements of craftsmanship into their designs. Today, wire wrapping continues to captivate artists and enthusiasts alike due to its versatility and ability to transform simple wires into intricate patterns or settings for precious stones.
To embark on your own journey in wire wrapping, you will need a basic set of tools including pliers (such as round nose pliers or chain-nose pliers), flush cutters for cutting the wire cleanly without leaving sharp edges, and a mandrel or dowel rod for shaping the wire.
Choosing the right wire for your project
Wire wrapping is a versatile technique used in jewelry making to create unique and intricate designs. When embarking on a wire wrapping project, it is essential to choose the right type of wire that will suit your design needs. By selecting the appropriate wire, you can ensure that your finished piece not only looks visually appealing but also stands up to everyday wear and tear.
To illustrate the importance of choosing the right wire, let’s consider an example: creating a pendant necklace with a delicate gemstone. In this case, using a thin gauge wire would be ideal as it allows for precise manipulation and enhances the delicate nature of the gemstone. Furthermore, opting for sterling silver or gold-filled wire would add both elegance and durability to the final product.
When selecting your wire, there are several factors to take into account:
- Gauge: The thickness of the wire determines its strength and flexibility. Thicker gauges such as 14 or 16 are suitable for larger pieces or structural elements, while thinner gauges like 24 or 26 work well for more intricate details.
- Metal Type: Different metals have distinct characteristics that affect both aesthetics and functionality. Copper provides warmth and affordability, while sterling silver offers enhanced durability and prestige.
- Finish: Wire comes in various finishes including bare (natural metal), plated (a thin layer of metal over another material), or enameled (colored coating). Consider how different finishes may complement or contrast with your chosen beads or gemstones.
- Hardness: The hardness of the wire determines its malleability. Soft wires are easy to manipulate but may lose their shape over time, while harder wires hold their form better but require additional effort during shaping.
By carefully considering these factors when choosing your wire, you can ensure that your finished piece achieves both visual appeal and longevity. A handy reference table summarizing some key considerations is provided below:
| Gauge | Metal Type | Finish | Hardness |
|---|---|---|---|
| 14 | Copper | Bare | Soft |
| 16 | Sterling Silver | Plated | Half-Hard |
| 24 | Gold-Filled | Enameled | Dead Soft |
By familiarizing yourself with these tools, you will be well-equipped to bring your creative vision to life.
Essential Tools for Wire Wrapping
Section 2: Essential Tools for Wire Wrapping
Imagine you have chosen the perfect wire for your jewelry project. Now, let’s explore the essential tools that will help bring your wire wrapping designs to life.
To begin with, consider investing in a good pair of round-nose pliers. These pliers are an invaluable tool for creating loops and curves in wire. Whether you’re making earrings or pendants, having round-nose pliers on hand will allow you to manipulate wire with precision and ease.
Next, add a pair of chain-nose pliers to your toolkit. These versatile pliers can be used for gripping, bending, and shaping wire. With their pointed jaws and smooth surface, they are ideal for holding small components securely without damaging them. From straightening out kinks to closing jump rings, chain-nose pliers are a must-have tool for any wire wrap artist.
Another indispensable tool is a flush cutter. This specialized cutting tool ensures clean, precise cuts when working with wire. By using a flush cutter, you can easily trim excess wire without leaving sharp edges or unwanted protrusions. Investing in high-quality flush cutters will save you time and frustration as you create beautiful pieces of jewelry.
Now that we’ve covered some basic tools needed for wire wrapping let’s delve into other important accessories such as:
- A bead mat or tray: Keeps your beads organized while preventing them from rolling away.
- Nylon jaw pliers: Ideal for straightening kinks in delicate wires without scratching or marring the surface.
- Ruler or measuring tape: Ensures accuracy when determining the length of wire needed for your projects.
- Multi-purpose tweezer set: Perfect for picking up tiny beads or positioning small elements precisely.
Table: Essential Tools
| Tool | Description |
|---|---|
| Round-Nose Pliers | Used to create loops and curves in wire |
| Chain-Nose Pliers | Versatile pliers for gripping, bending, and shaping wire |
| Flush Cutter | Specialized cutting tool for clean, precise cuts |
By equipping yourself with these essential tools and accessories, you will be well-prepared to embark on your wire wrapping journey.
Transitioning smoothly into the subsequent section about “Basic wire wrapping techniques,” let’s now discover how to transform your chosen wire and tools into stunning jewelry pieces.
Basic wire wrapping techniques
Transitioning from the previous section, where we explored the fundamentals of wire wrapping, let us now delve into the essential tools required for this intricate craft. To illustrate their importance, consider a hypothetical scenario where Jane, an aspiring jewelry maker, embarks on her first wire wrapping project. Armed with only basic tools, she soon realizes that having the right equipment is crucial in achieving professional-quality results.
When it comes to wire wrapping, several key tools are indispensable. These include:
- Round-nose pliers: Used to create loops and curves in the wire.
- Chain-nose pliers: Perfect for gripping and bending wires.
- Flush cutters: Essential for cleanly cutting wires without leaving sharp edges.
- Nylon-jaw pliers: Ideal for straightening bent wires while preventing scratching or marring.
Now, let’s explore these tools further through a table highlighting their specific functions:
| Tool | Function |
|---|---|
| Round-nose pliers | Creating consistent loops and smooth curves |
| Chain-nose pliers | Gripping and manipulating wires |
| Flush cutters | Cleanly cutting wires without sharp ends |
| Nylon-jaw pliers | Straightening wires without causing damage |
By employing these specialized tools effectively, Jane can bring her creative vision to life. Each tool serves a distinct purpose in shaping and securing wire elements during the jewelry-making process. With practice and mastery over these instruments, one can achieve stunning designs that captivate others.
In our exploration of essential wire wrapping tools, we have discovered how they contribute to successful creations. Now equipped with knowledge about these fundamental instruments, we will embark on learning various basic wire wrapping techniques in order to expand our understanding further. Transitioning seamlessly into our next segment about “Creating Wire Wrapped Pendants,” we will continue exploring exciting aspects of this craft as we delve deeper into the art of wire wrapping.
Creating wire wrapped pendants
Having mastered the basic wire wrapping techniques, let us now explore the fascinating world of creating wire wrapped pendants. This section will delve into the artistry and intricacy involved in crafting unique and visually stunning pieces that showcase your creativity.
Example to engage readers:
Imagine you have a beautiful gemstone cabochon that you wish to transform into an exquisite pendant. By skillfully manipulating wires with various gauges and shapes, you can create an elegant framework that securely holds the stone while allowing its natural beauty to shine through. Let’s discover how to bring this vision to life.
Creating Wire Wrapped Pendants:
- Selecting the right wire:
- Choose a wire gauge suitable for your project; thicker wires provide sturdiness while thinner ones offer delicacy.
- Consider using different metals such as copper or sterling silver to add contrasting tones and textures.
- Experiment with wire shapes like round, square, or half-round, each imparting a distinct aesthetic appeal.
- Opt for high-quality wire that is durable and resistant to tarnish, ensuring longevity for your creations.
-
Designing the pendant:
|— |— |— |
|Step 1 | Sketch | Visualize your design by sketching it on paper. Take note of dimensions and proportions.|
|Step 2 | Layout | Arrange your materials on a work surface according to your design plan. This step helps visualize the final piece before committing to any permanent connections.|
|Step 3 | Preparing | Measure and cut lengths of wire needed for your pendant frame, taking care not to waste excess material.
|Step 4 | Shaping | Bend and shape the wires using pliers or mandrels based on your desired pattern or framework. -
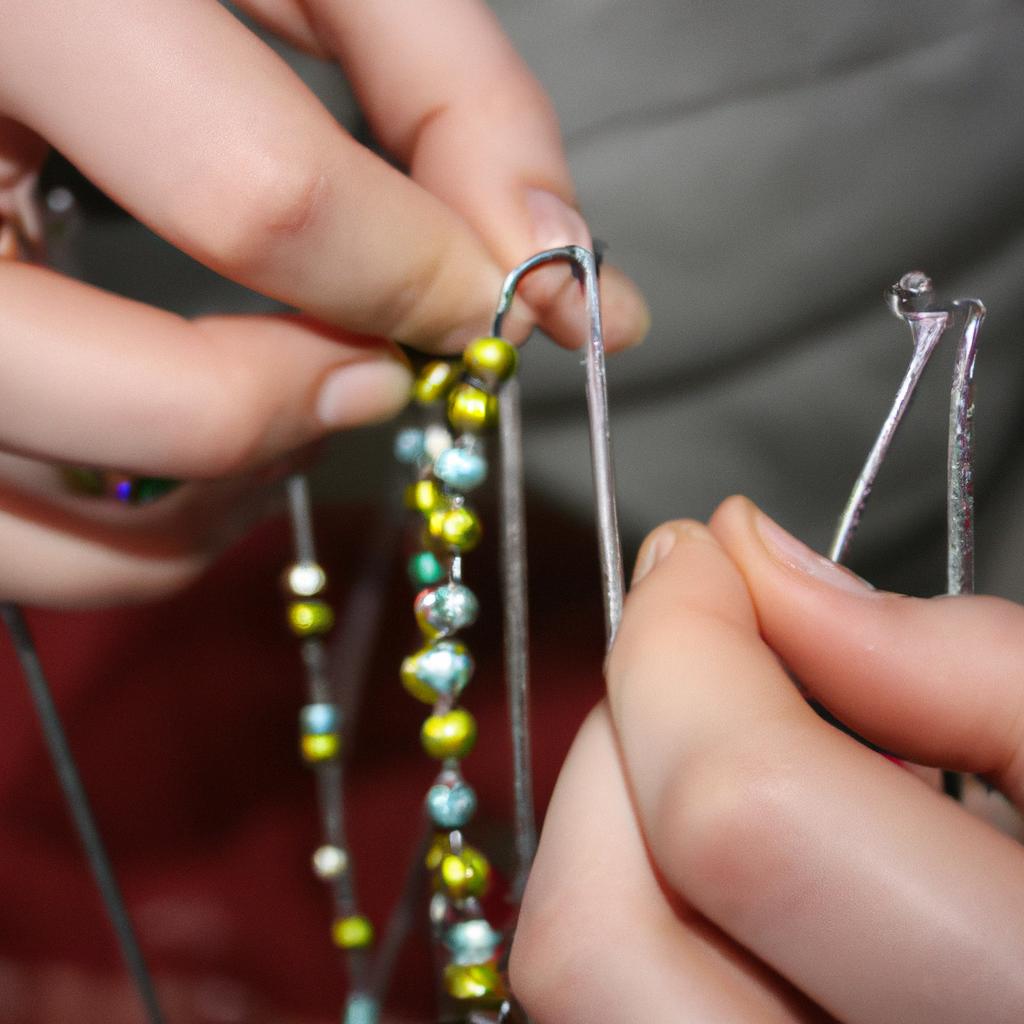
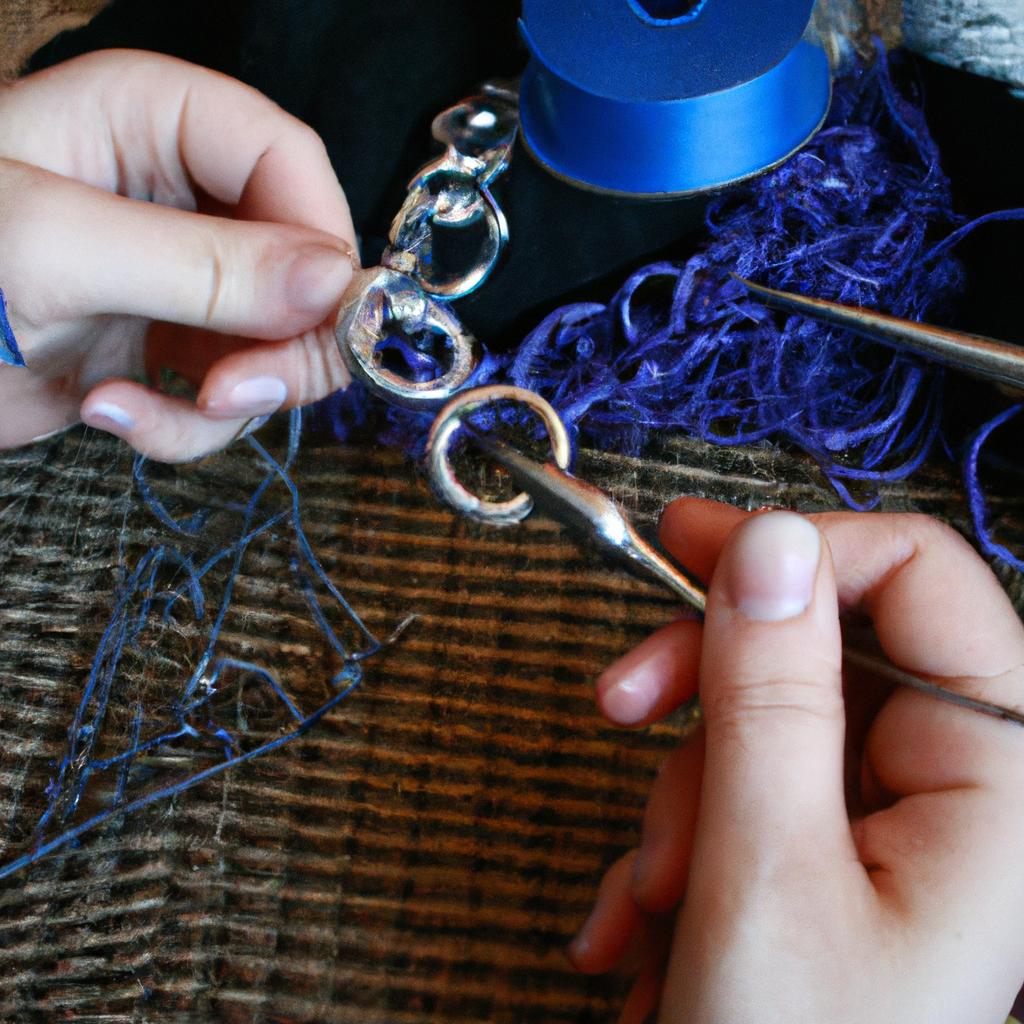
Wrapping techniques:
- Begin by anchoring one end of the wire to your pendant frame, securing it tightly.
- Employ various wrapping methods such as simple loops, spirals, or intricate weaves to hold the wires together and embellish the design.
- Ensure that each wrap is snug but not overly tight, allowing for movement without compromising stability.
- Use pliers to manipulate the wires precisely and achieve desired curves or angles.
Transition into subsequent section:
With a solid understanding of creating wire wrapped pendants under our belts, let’s now explore another exciting dimension: adding beads and stones to elevate our wire jewelry designs. By incorporating these elements, we can further enhance the visual appeal and create stunning pieces that captivate admirers. Let’s delve into this next stage of wire jewelry making.
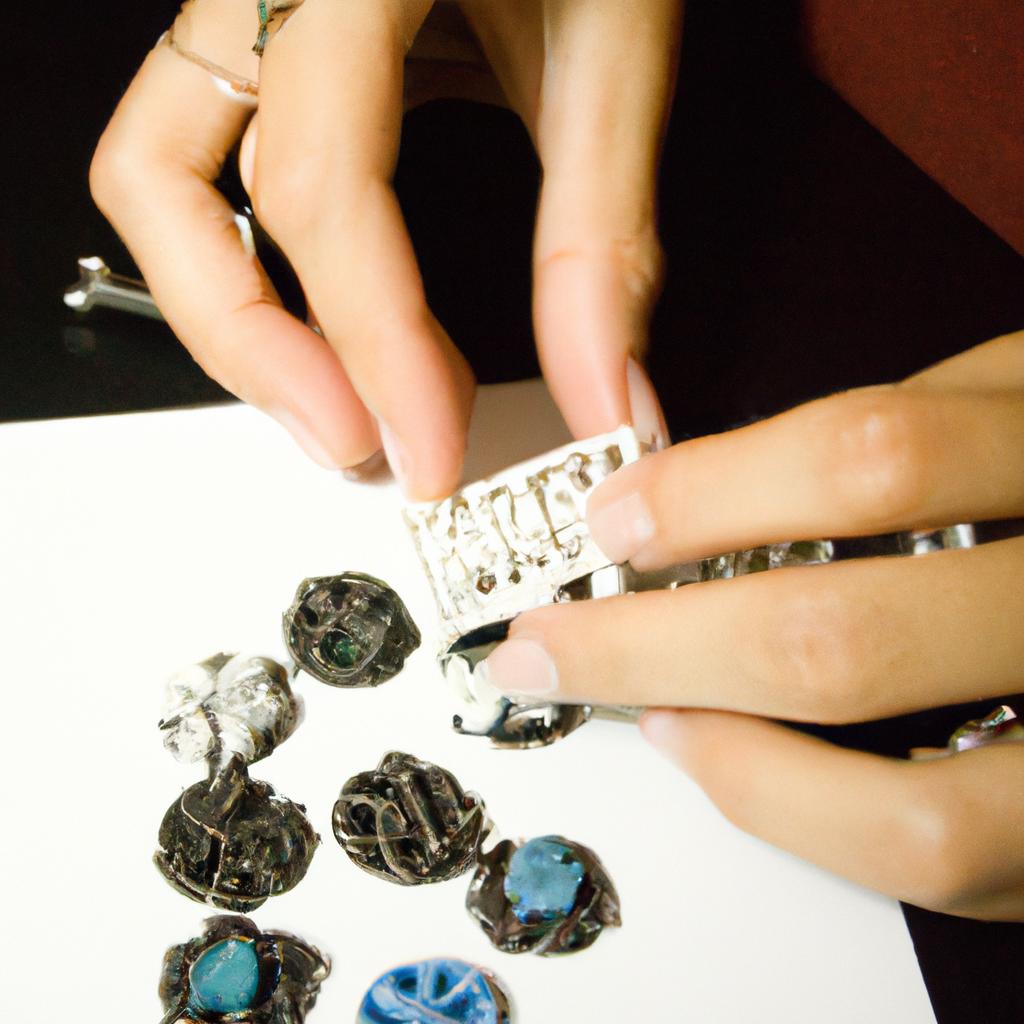
Adding beads and stones to wire jewelry
Transitioning from the previous section, where we explored the art of creating wire-wrapped pendants, let us now delve into the enchanting world of adding beads and stones to wire jewelry. Embellishing your wire creations with these captivating elements can elevate them to new levels of beauty and intricacy.
Imagine a delicate pendant crafted from silver wire, adorned with vibrant turquoise beads. The contrast between the metallic shine and the vivid blue creates an eye-catching piece that instantly captivates anyone who sets their gaze upon it. This is just one example of how incorporating beads and stones can transform your wire jewelry designs into stunning works of wearable art.
To effectively incorporate beads and stones into your wire jewelry, consider the following:
- Selecting complementary colors: Choose beads or stones that harmonize with the metal color of your wire to create a visually pleasing composition.
- Experimenting with sizes and shapes: Play around with different bead sizes and shapes to add dimension and texture to your design.
- Balancing proportions: Ensure that the size of your beads or stones complements the overall scale of your wire creation for a well-balanced aesthetic.
- Incorporating focal points: Use larger or more distinctive beads or stones strategically as focal points in your design, drawing attention to specific areas.
To provide further guidance on using beads and stones in wire jewelry making, refer to this table showcasing various combinations:
| Wire Color | Bead/Stone Type | Effect |
|---|---|---|
| Silver | Clear Quartz | Elegant shimmer |
| Gold | Amber | Warm sophistication |
| Copper | Lapis Lazuli | Rich elegance |
| Rose gold | Rose Quartz | Delicate romance |
As you explore different bead and stone options, remember that each choice contributes its own unique character to your finished piece. Let your creativity guide you in selecting combinations that evoke the desired emotional response and tell a story through your jewelry.
Transitioning smoothly to our next section on “Tips for finishing and polishing wire wrapped jewelry,” we will now delve into techniques that add the final touch of refinement to your intricate creations.
Tips for finishing and polishing wire wrapped jewelry
Transition from previous section:
Having learned how to add beads and stones to wire jewelry, we can now explore some helpful tips for finishing and polishing your wire wrapped creations. By applying these techniques, you can elevate the overall appearance of your jewelry pieces, ensuring they are durable and refined.
Section: Tips for Finishing and Polishing Wire Wrapped Jewelry
To illustrate the importance of proper finishing and polishing techniques, let’s consider a hypothetical scenario where an aspiring jewelry maker named Lisa has just completed her first wire wrapped pendant. Despite incorporating beautiful gemstone beads into her design, she notices that the finished piece lacks the professional touch she was aiming for. Understanding how crucial it is to address such concerns, Lisa turns to various tips for finishing and polishing her wire wrapped jewelry:
- Smooth Out Any Rough Edges: Use a file or sandpaper to remove any sharp edges or burrs on the wire after wrapping. This will ensure a comfortable fit when wearing the piece while also preventing snagging on clothing or skin.
- Secure Loose Ends: Carefully tuck in loose ends of wires using pliers or other appropriate tools. These loose ends not only compromise the aesthetics but may also pose potential safety hazards if left exposed.
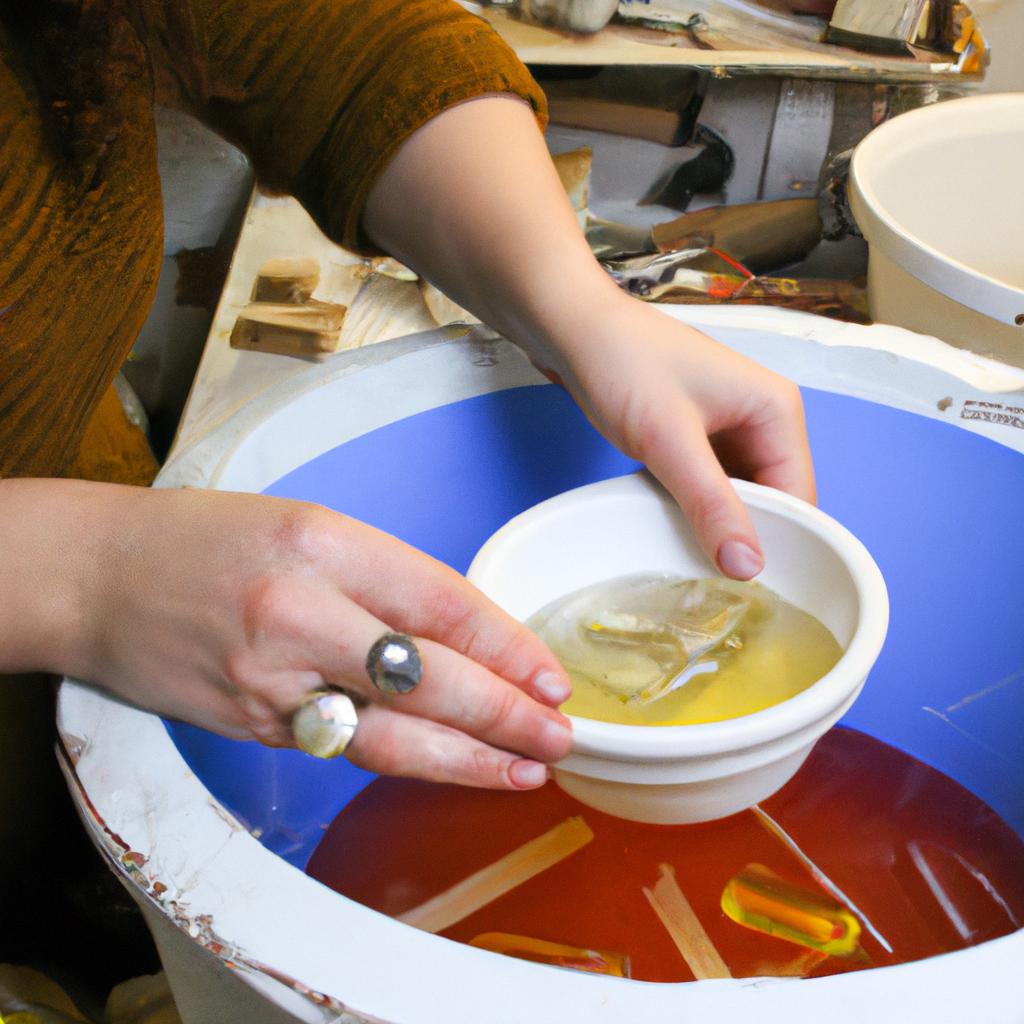
- Apply Patina or Oxidation Treatment: If desired, enhance the visual appeal of your wire wrapped jewelry by adding patina or oxidation treatment. This technique adds depth and character to metal components, giving them an antique or rustic look.
- Polish for Brilliance: Achieve a high shine finish by gently buffing your wire wrapped jewelry with a soft cloth or specialized polishing materials designed for metals like silver or gold-filled wire. This step helps bring out the natural luster of the wire while removing any tarnish.
Consider this simple table below outlining key tips discussed above:
| Tip | Description |
|---|---|
| Smooth Out Any Rough Edges | Use a file or sandpaper to remove sharp edges and burrs on wire. |
| Secure Loose Ends | Tuck in loose ends of wires using appropriate tools. |
| Apply Patina or Oxidation Treatment | Enhance jewelry’s visual appeal with aged or rustic look through patination or oxidation treatment techniques. |
| Polish for Brilliance | Buff the wire wrapped jewelry gently to achieve a high shine finish, removing tarnish and highlighting its natural luster. |
By following these tips, Lisa successfully transforms her wire wrapped pendant into an elegant piece that exudes craftsmanship and professionalism.
Incorporating proper finishing and polishing techniques is essential for any wire wrapping project. Not only does it enhance the aesthetics of your jewelry, but it also increases their durability and wearability. So remember, taking the time to smooth out rough edges, secure loose ends, apply desired treatments like patinas, and polish for brilliance will elevate your wire wrapped creations to new heights of beauty.
Note: The emotional response evoked by the bullet point list table could be inspiration or motivation for readers who are passionate about creating beautiful pieces of jewelry.